Nettemp Client Installation
Install Nettemp Client on Raspberry Pi / Linux using pipx (recommended).
Prerequisites
- Raspberry Pi (any model) or Linux device (Debian/Ubuntu)
- Python 3.9+
- Internet connection
- Sudo access
Install with pipx (Recommended)
pipx installs Nettemp as a global CLI, but keeps dependencies isolated.
sudo apt update
sudo apt install -y python3 python3-pip pipx

pipx ensurepath
pipx install "nettemp @ git+https://github.com/sosprz/nettemp_client.git"

# Start a new shell (or log out/in) so PATH updates apply
sudo su - ${USER}
Configure & Run
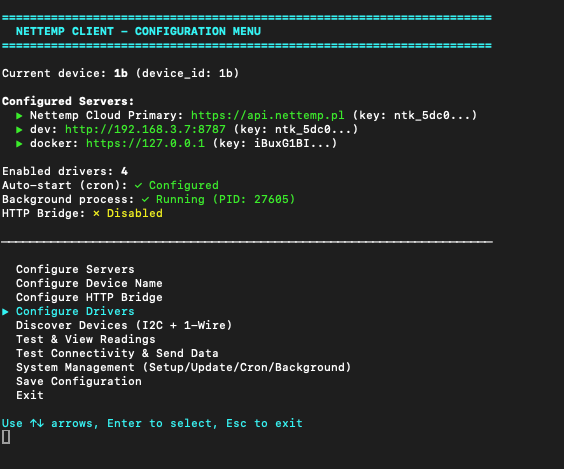
# Interactive configurator
nettemp config

# Foreground client (debug)
nettemp client

# Background client
nettemp client start
nettemp client stop
nettemp client restart
Where Configuration Files Live
By default, Nettemp stores configuration and runtime files in:
~/.nettemp_client(override withNETTEMP_CONFIG_DIR/NETTEMP_DATA_DIR)
Key files:
config.conf— device + server settingsdrivers_config.yaml— local sensor driversmqtt_rules.yaml— MQTT parsing rulestheengs_gateway_config.json— generated TheengsGateway confignettemp_client.log— client logs
Auto-start on Boot
Use the configurator:
nettemp config → System Management → Setup Auto-Start (Cron Job)
Updating
pipx upgrade nettemp
nettemp client restart
Uninstalling
nettemp config
# → System Management → Remove Auto-Start (Cron Job)

pipx uninstall nettemp

# Optional: remove configs/logs
rm -rf ~/.nettemp_client
Troubleshooting
- Missing dependency in pipx environment:
pipx runpip nettemp install <package> - View logs:
tail -n 200 ~/.nettemp_client/nettemp_client.log
Support
Need help? Contact us:
- Discord: discord.gg/S4egxNvQHM