Xiaomi Mi Temperature & Humidity Monitor 2 (LYWSD03MMC) in Nettemp: Active vs Passive
In the previous post I covered the BLE → MQTT flow. Today I’m focusing on the popular Xiaomi Mi Temperature & Humidity Monitor 2 (LYWSD03MMC) and the two practical ways to integrate it with Nettemp.
In practice you have two paths:
- Active mode – a device (e.g., Raspberry Pi Zero 2 W / 2 W with Bluetooth) connects to the sensor over BLE and reads data via GATT.
- Passive mode (advertising) – the sensor broadcasts data in BLE advertisements, and the receiver only listens (no pairing and no persistent connections).
Active mode: quick start, higher battery drain
In active mode the Raspberry Pi acts like a BLE client: it connects to the sensor and reads measurements.
Pros
- Very fast setup (especially if you already have a Pi with Bluetooth).
- Good control over when/how often you read data.
Cons
- Frequent connections and data exchange usually mean faster battery drain in the sensor.
- With more sensors, the “connection management” cost grows (time, interference, scheduling).
Passive mode (advertising): best balance for battery and scale
In passive mode the sensor sends data in BLE advertisements and the receiver only listens. In real homes this often wins: it’s lighter and scales better.
The key idea is switching the firmware to one that broadcasts sensor data (e.g., ATC / PVVX), so:
- the receiver doesn’t need to connect to the sensor,
- there’s no constant BLE “back-and-forth” between two devices,
- the sensor battery usually lasts longer.
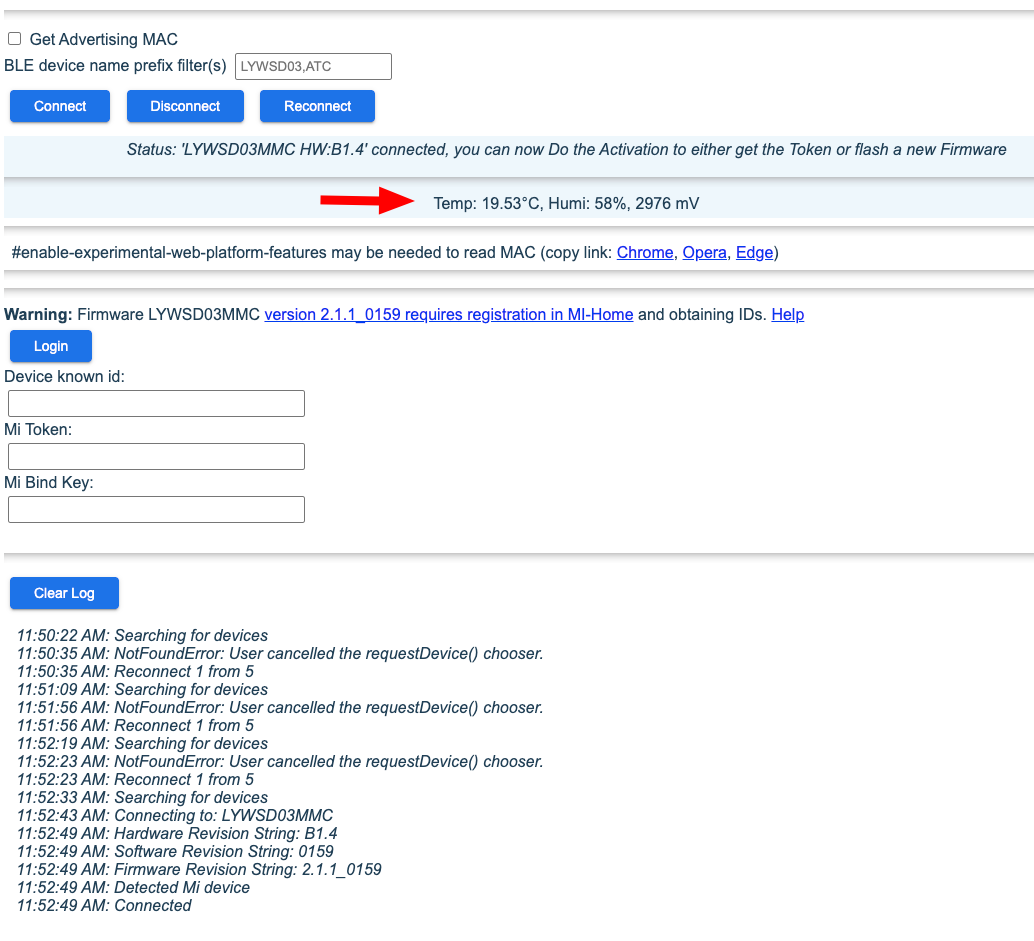
Required step for passive mode: Mi Home + token/bindkey
To flash LYWSD03MMC without soldering, a typical flow looks like this:
- Add the sensor to Xiaomi Mi Home (bind the device to your account).
- Extract credentials (tokens / bindkey) via a token extractor.
- Use a BLE web flasher (TelinkMiFlasher) and flash a broadcasting firmware (e.g., PVVX).
Note: details depend on your sensor revision and current firmware—always follow the instructions for your exact device/firmware.
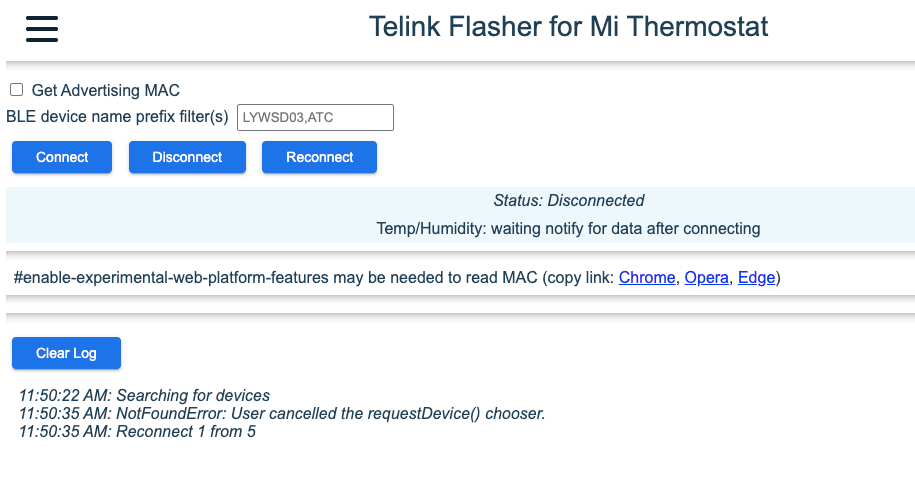
Flashing: TelinkMiFlasher (PVVX)
The flasher works in the browser (Web Bluetooth; Chrome recommended), so you don’t need a programmer or soldering:
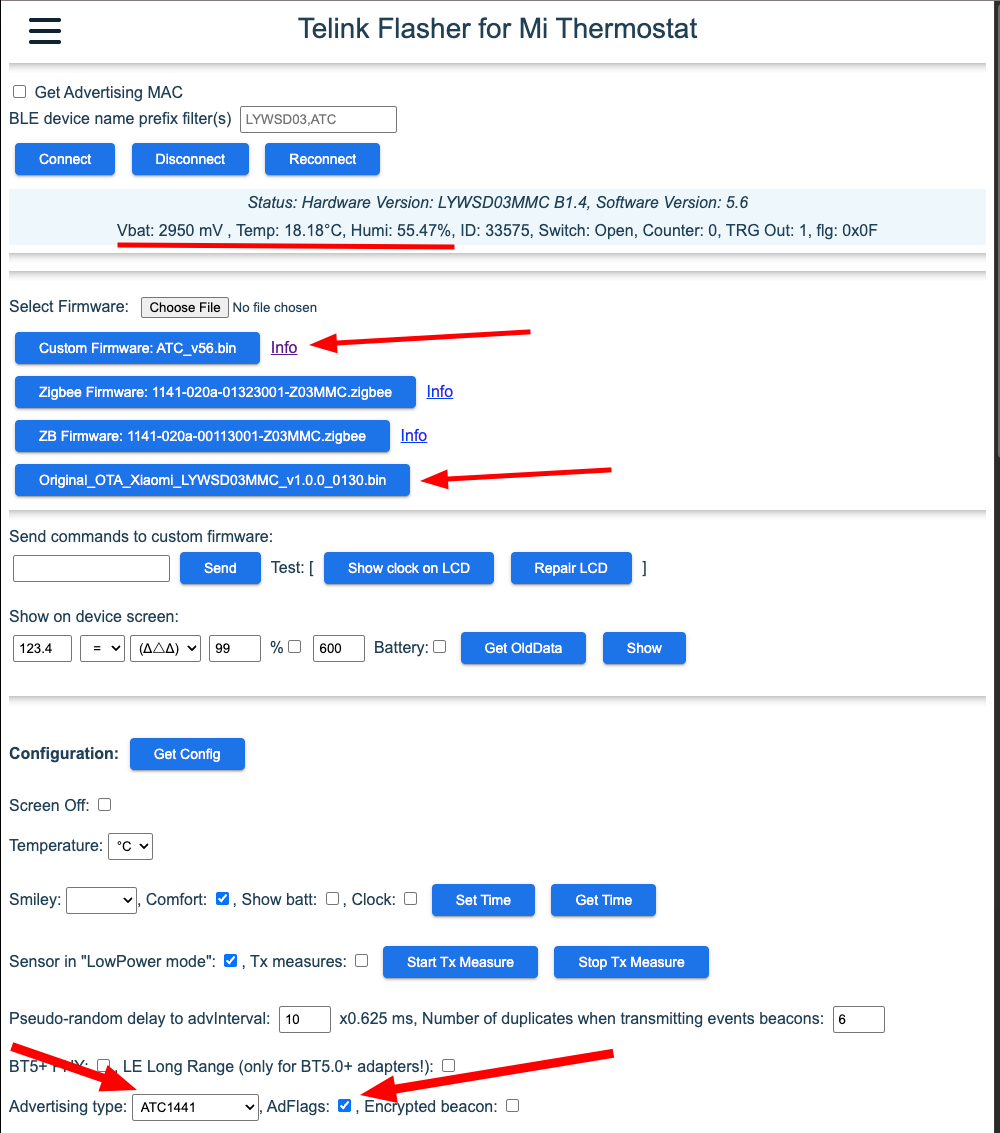
After a successful flash you can configure the advertising mode and other broadcast parameters.
BLE → MQTT bridge: ESP32 or Raspberry Pi
On the receiver side you usually pick one of these:
- ESP32 (e.g., OpenMQTTGateway) scans BLE and publishes to MQTT.
- Raspberry Pi scans BLE locally and publishes to MQTT (or runs a gateway that does it).
Nettemp (via nettemp config) can “wire” this setup so data ends up on your MQTT broker and then in Nettemp Cloud / Docker.
Quick checklist (very short)
1) Add to Xiaomi Mi Home
- Add the sensor in the Mi Home app (account binding is needed to get keys).
2) Token extractor (token/bindkey)
3) Flash PVVX via TelinkMiFlasher
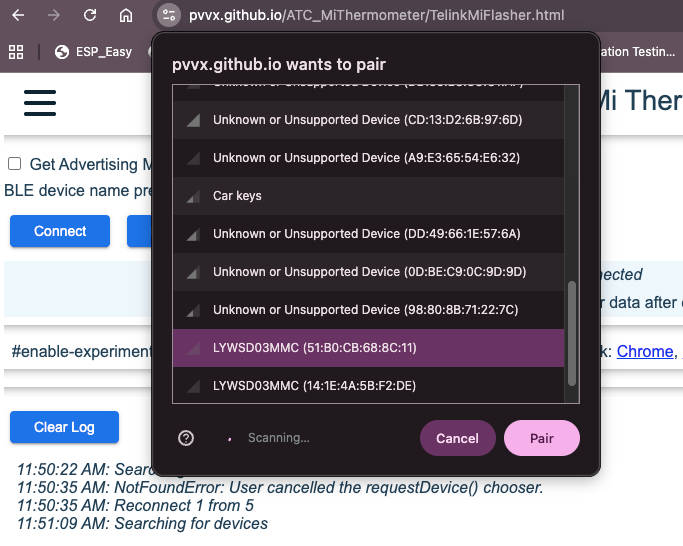
- Open: https://pvvx.github.io/ATC_MiThermometer/TelinkMiFlasher.html
- Connect
- Provide token and BLE KEY / bindkey (if required for your variant)
- Start flashing
- After success: connect again (Connect) and set advertising parameters, e.g.:
- Advertising type: ATC1441
- AdFlags
- (optional) Get name / Set name
- Send Config → Disconnect